Groutmixing Guide: Perfect Tile Installation Steps
Discover our comprehensive groutmixing guide for perfect tile installations. Learn about water ratios, slake times, and professional mixing techniques today.
Table of Contents
- Quick Summary
- Market Snapshot
- Introduction
- Understanding Material Composition and Ratios
- The Step-by-Step Grout Mixing Process
- The Critical Role of Slake Time and Hydration
- Equipment Selection and Environmental Factors
- Questions from Our Readers
- Comparing Mixing Methodologies
- Practical Tips for Flawless Results
- Before You Go
- Learn More
Quick Summary
A grout mixing guide is a comprehensive instructional framework detailing the precise procedures for combining cementitious powders and liquids to achieve optimal structural integrity. This process ensures proper hydration, prevents segregation, and guarantees long-lasting durability for tile and machinery installations.
Market Snapshot
- The U.S. tile and stone installation materials market reached $3.5 billion in manufacturer sales (Tile Council of North America, 2023)[1].
- The global tile grout market is projected to grow at a 5.4% CAGR from 2024 to 2030 (Grand View Research, 2024)[2].
- ASTM standards require nonshrink cementitious grout to demonstrate 5,000 psi compressive strength at 28 days (ASTM International, 2023)[3].
- Typical cement-based tile grout maintains a pot life of up to 45 minutes under normal conditions (Mapei Corporation, 2024)[4].
Grout mixing protocols form the foundation of any successful tiling or structural support project. Whether you are installing ceramic tiles in a residential bathroom or securing heavy machinery bases in an industrial facility, the quality of your mixed materials dictates the longevity of the installation. Many DIY enthusiasts and even some professionals overlook the chemical complexities involved in combining dry powders with water. This oversight often leads to weak joints, cracking, and premature failure. By understanding the science behind cementitious materials, installers can avoid these costly mistakes. This article explores the critical variables that influence material performance, from precise liquid measurements to essential resting periods. We will break down the exact methodologies required to achieve a flawless, lump-free consistency. Read on to master the techniques that ensure your setting materials perform exactly as engineered.
Understanding Material Composition and Ratios
The structural integrity of any installation begins with strict adherence to the manufacturer’s specified powder-to-water ratio. In cementitious materials like grout, careful control of the water-to-cement ratio is crucial because even small increases in water can significantly reduce strength and increase permeability (Massachusetts Institute of Technology, 2023)[5]. Adding excess liquid might make the mixture easier to spread initially, but it fundamentally compromises the final cure. For standard applications, a typical cementitious grout for tile installations requires a 3:1 powder-to-water ratio by weight (Mapei Corporation, 2024)[4]. To illustrate, a standard 25-lb bag generally requires exactly 3.5 pounds of water for proper mixing (Mapei Corporation, 2024)[4].
Deviating from these precise measurements disrupts the chemical hydration process. When too much liquid is introduced, the heavy aggregates settle at the bottom while the cement paste rises to the surface, a phenomenon known as bleeding. This results in a weak, porous surface that is highly susceptible to staining and cracking. Conversely, a mixture that is too dry will fail to flow into the joints properly, leaving voids that compromise the structural bond.
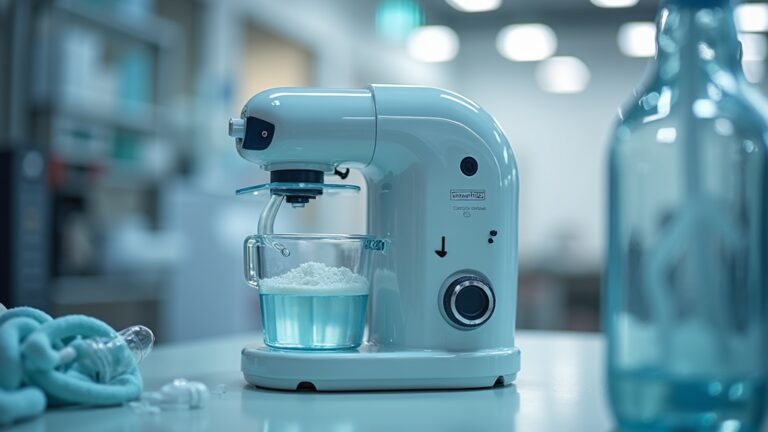
To achieve the ideal fluid consistency, professionals often rely on specialized equipment rather than manual stirring. Exploring various colloidal mixer equipment options can significantly improve the uniformity of the blend, ensuring that every particle is fully encapsulated. High-shear mixing tools break down agglomerates that hand mixing simply cannot resolve. Ultimately, respecting the exact liquid measurements provided in the technical data sheets is non-negotiable for achieving maximum compressive strength and long-term durability in both residential and commercial projects.
The Step-by-Step Grout Mixing Process
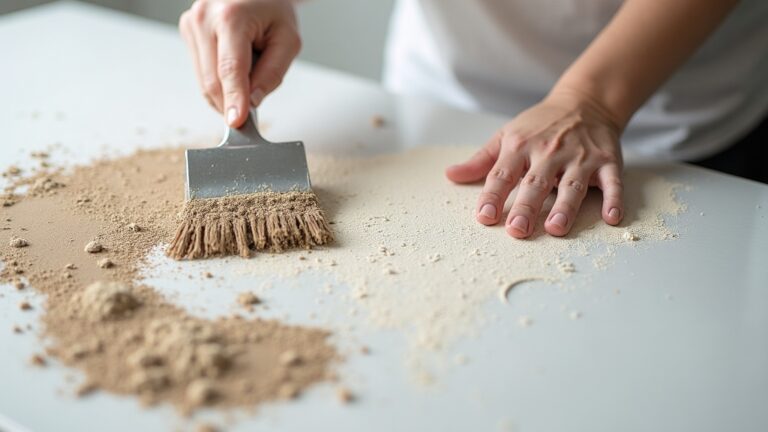
Executing a systematic blending sequence is essential for achieving a smooth, lump-free consistency. Before introducing any liquid, always dry-blend the powder in a separate bucket to redistribute raw materials that may have settled (Mapei Corporation, 2023)[6]. This preliminary step is frequently overlooked but is vital for ensuring that the polymers and cementitious binders are evenly distributed throughout the batch. Once the dry components are homogenous, slowly add the measured water while the mechanical paddle is in motion.
The mechanical agitation must continue for a specific duration to guarantee full hydration. Current technical documentation specifies that cementitious grout should be mixed for 5 minutes before slaking (Mapei Corporation, 2023)[6]. This sustained agitation breaks down dry pockets and activates the chemical modifiers within the setting materials. For those looking to deepen their understanding of material mechanics, reviewing MIT civil engineering material science notes provides excellent foundational knowledge on how these compounds interact at a molecular level.
As the blending progresses, installers must continuously evaluate the texture of the compound. As you mix, be sure to check the consistency of your grout. For walls it should be strong and thick, similar to bread dough, while floor grout will be a bit smoother, like peanut butter (Rubi Tools USA, 2024)[7]. Achieving this precise texture ensures that the material will stay in place on vertical surfaces without sagging, while still flowing adequately into horizontal joints. If the mixture appears too stiff, resist the urge to add more water; instead, use a wet sponge to introduce minimal moisture to the surface.
The Critical Role of Slake Time and Hydration
Allowing the blended compound to rest is a mandatory chemical phase that cannot be rushed or skipped. This resting period, known as slake time, permits the dry particles to fully absorb the liquid and allows entrapped air bubbles to escape from the mixture. Professional tiling guidance commonly recommends allowing grout to slake for 10 minutes after initial mixing before remixing and applying (Rubi Tools USA, 2024)[7]. During this window, the chemical modifiers and polymers within the dry powder completely dissolve and activate, which is essential for achieving the designed adhesion and flexibility.
Skipping the slake time results in a mixture that feels deceptively workable but lacks structural cohesion. Without this rest period, the unhydrated particles will continue to absorb moisture from the surrounding environment and the substrate after application. This delayed absorption causes the material to shrink excessively as it cures, leading to hairline cracks and compromised joints. Furthermore, failing to let the air bubbles rise to the surface during the rest phase will trap them within the joints, creating pinholes that detract from the aesthetic quality of the tile installation.
Once the designated resting period has elapsed, the material must be remixed briefly to restore its plasticity. It is imperative that this secondary blending is performed without adding any additional liquid. Introducing more water at this stage breaks the chemical bonds that have begun to form, severely weakening the final cure and altering the color uniformity. By strictly observing the required rest intervals, installers ensure that the setting materials achieve their maximum designed performance, resulting in joints that are dense, durable, and visually consistent across the entire project area.
Equipment Selection and Environmental Factors
The choice of blending tools and the surrounding environmental conditions heavily influence the final quality of the installation. Using a high-speed drill can introduce excessive air into the mixture and generate friction heat, which accelerates the curing process prematurely. Professionals recommend using a low-speed, high-torque drill paired with a specialized mixing paddle designed to fold the material rather than whip it. This gentle folding action maintains the dense, nonsegregating consistency required for structural integrity. Reviewing detailed equipment specification samples can help contractors select the exact paddle geometry and motor torque required for their specific batch sizes.
Environmental variables such as ambient temperature and relative humidity also dictate how the material behaves once mixed. Under standard conditions, typical cement-based tile grout has a pot life of up to 45 minutes (Mapei Corporation, 2024)[4]. However, in hot and dry environments, this working window shrinks dramatically as moisture evaporates from the surface of the mixture. Conversely, cold temperatures slow down the chemical hydration, extending the working time but delaying the final set. Installers must adjust their batch sizes accordingly, mixing only as much material as can be comfortably applied within the viable working window.
Proper storage of the dry materials prior to use is equally important to ensure predictable performance. Properly stored cement-based grout products have a typical shelf life of 12 months from the date of manufacture (Custom Building Products, 2024)[8]. Storing bags in damp or unconditioned warehouses allows ambient moisture to pre-hydrate the cement, resulting in a sluggish, weak mixture that will never achieve its rated strength. Keeping materials in a climate-controlled, dry environment guarantees that the chemical reactions will only initiate when the installer intentionally adds the measured water, separating amateur work from professional-grade results.
Questions from Our Readers
Why does my mixed grout dry lighter than the color on the box?
Can I save leftover mixed grout for use the next day?
What is the difference between sanded and unsanded grout?
How do I clean my mixing tools before the material hardens?
Comparing Mixing Methodologies
Selecting the appropriate blending methodology depends heavily on the scale of the project and the specific performance requirements of the installation. Each approach offers distinct advantages regarding consistency, speed, and labor intensity.
| Methodology | Best Application | Consistency Quality |
|---|---|---|
| Manual Hand Mixing | Small repairs and touch-ups | Prone to lumps; lower structural integrity |
| Low-Speed Drill Mixing | Standard residential tile installations | Smooth and uniform when following a grout mixing guide |
| Colloidal High-Shear Mixing | Industrial machinery bases and structural support | Perfect particle encapsulation; maximum compressive strength |
While manual methods suffice for minor aesthetic repairs, professional contractors rely on mechanical agitation to guarantee the chemical modifiers are fully activated. High-shear colloidal systems are strictly reserved for critical structural applications where zero permeability and maximum load-bearing capacity are non-negotiable.
Practical Tips for Flawless Results
Implementing a few professional habits on the job site can drastically reduce errors and improve the overall efficiency of your tile installation. First, always use a digital scale rather than relying on volume measurements like cups or buckets. Weighing both the dry powder and the liquid ensures absolute precision, eliminating the guesswork that leads to weak or discolored joints. Second, condition your mixing bucket by wiping the interior with a damp sponge before adding the dry ingredients; this prevents the initial batch of powder from sticking to the dry plastic and forming stubborn clumps.
Temperature management is another critical factor. In hot weather, use chilled water to extend the working time and prevent the mixture from flashing off too quickly. Conversely, use warm water in cold environments to kickstart the hydration process. Finally, never scrape the dried edges of a partially used bucket into a fresh batch. Those semi-cured fragments will act as weak points in the new mixture, accelerating the set time and creating visible imperfections in the finished joints. Maintaining a clean workspace and strictly adhering to these professional protocols ensures consistent, high-quality results on every project.
Before You Go
Mastering the nuances of material preparation is the ultimate differentiator between amateur repairs and professional-grade installations. By strictly controlling the water ratios, respecting the mandatory slake times, and utilizing the correct mechanical equipment, you ensure that every joint achieves its maximum designed strength and aesthetic appeal. A reliable grout mixing guide provides the foundational knowledge necessary to avoid the most common and costly application errors. For more in-depth tutorials, equipment reviews, and advanced material science insights, we encourage you to explore the extensive resources and expert articles available on colloidalgroutmixer.com to elevate your next project.
Learn More
- Economics of the U.S. Tile Industry. Tile Council of North America.
https://www.tcnatile.com/faqs/72-economics-of-the-us-tile-industry.html - Tile Grout Market Report. Grand View Research.
https://www.grandviewresearch.com/industry-analysis/tile-grout-market-report - ASTM C1107 Standard Specification. ASTM International.
https://www.astm.org/c1107_c1107m-21.html - Keracolor S Technical Data Sheet. Mapei Corporation.
https://cdnmedia.mapei.com/docs/librariesprovider65/products-documents/3000072-keracolor-s-en.pdf - Mechanics of Materials Lecture Notes. Massachusetts Institute of Technology.
https://ocw.mit.edu/courses/1-54-mechanics-of-materials-spring-2007/pages/lecture-notes/ - Mixing Partial Units of Grout. Mapei Corporation.
https://cdnmedia.mapei.com/docs/librariesprovider65/line-technical-documentation-documents/19-1736_mixing_partial_units_of_grout-en_lr.pdf - How to Mix Grout Perfectly Every Time. Rubi Tools USA.
https://www.rubi.com/us/blog/how-to-mix-grout/ - Product Warranties and Shelf Life. Custom Building Products.
https://www.custombuildingproducts.com/faqs/product-warranties-and-shelf-life/
For more about Groutmixing guide, see Groutmixing Guide.