The Ultimate Groutmixing Guide for Tile Projects
Discover the ultimate groutmixing guide for flawless tile installations. Learn proper ratios, slaking times, and mixing speeds for perfect results every time.
Table of Contents
- Essential Steps in Every Groutmixing Guide
- Equipment and Speed Requirements for Mixing
- Managing Ratios and Partial Batches
- Troubleshooting Consistency and Application
- Your Most Common Questions
- Comparing Grout Types
- Practical Tips for Installers
Quick Summary
A groutmixing guide is a comprehensive set of instructions detailing the precise methods for combining powder and liquid to achieve optimal mortar consistency. This quick summary highlights essential steps like dry-blending, maintaining correct revolutions per minute, and allowing proper slaking time to prevent cracking and ensure durable tile installations.
Market Snapshot
- The recommended mixing speed for most manufacturer specifications is 300 rpm to achieve proper dispersion (Ceramic Tile Education Foundation, 2024)[1].
- Professional training divides the process into 3 distinct phases: initial mixing, slaking, and remixing (Ceramic Tile Education Foundation, 2024)[1].
- Installers should allow 10 minutes of slaking time before remixing and applying the material (Rubi Tools USA, 2024)[2].
- There should be 0 lumps acceptable in a properly mixed batch before application (Rubi Tools USA, 2024)[2].
A reliable groutmixing guide is essential for any successful tile installation project. Whether you are working with ceramic tile or dense porcelain tile, the way you combine your materials dictates the longevity of the finished surface. Many DIY enthusiasts and even some professionals overlook the chemical reactions that occur when water meets cementitious powder. This oversight often leads to efflorescence, weak joints, or premature cracking. In this article, we will explore the fundamental principles of mortar consistency, the importance of precise water temperature, and the critical phases of preparation. By following a structured groutmixing guide, you can avoid common pitfalls and achieve a flawless finish. We will cover equipment selection, the vital slaking process, and best practices for partial batches, ensuring your joints remain durable and visually appealing for years to come.
Essential Steps in Every Groutmixing Guide
Proper preparation involves a strict three-phase sequence that activates the chemical binders within the mixture. According to industry experts, rushing this process is a primary cause of joint failure. Scott Carothers, Technical Director at the Ceramic Tile Education Foundation, emphasizes that “mixing mortars and grouts includes three phases: the initial mix, slaking, and remixing. Skipping any of these steps can compromise the performance of the grout” (Ceramic Tile Education Foundation, 2024)[1].
The first phase is the initial mix, where the liquid and powder are combined until uniform. The second phase, slaking, is a mandatory rest period. During this 10-minute window, the polymers and cementitious materials fully absorb the moisture, which eliminates dry pockets and ensures a consistent cure. Skipping the slaking time often results in color variation and weakened structural integrity.
The final phase is remixing. After the rest period, the mixture is stirred again briefly to restore its workable texture. It is crucial not to add more water during this stage, as altering the powder ratio after slaking will disrupt the chemical balance. Following this structured groutmixing guide guarantees that the material will adhere properly to the tile edges and cure with maximum strength. Furthermore, the water temperature plays a significant role in the curing time. Using water that is too hot can cause the mixture to flash-set, while cold water delays the chemical reaction. Always use clean, potable water at room temperature to maintain the ideal working environment.
Equipment and Speed Requirements for Mixing
Selecting the correct mixing paddle and controlling the motor speed are critical factors that directly influence the structural integrity of the final product. High-speed drills introduce excess air into the mixture, creating microscopic voids that weaken the joints. The recommended speed for most manufacturer specifications is around 300 revolutions per minute to achieve proper dispersion without entraining excessive air (Ceramic Tile Education Foundation, 2024)[1].
Using the right tool is just as important as controlling the speed. As Scott Carothers notes, “using the correct mixing paddle at the right speed is critical because improper mixing can weaken the grout and lead to failures such as cracking or powdering in service” (Ceramic Tile Education Foundation, 2024)[1]. A specialized paddle designed for grout will fold the ingredients together rather than whipping them, preserving the dense mortar consistency required for narrow joint widths.
Safety and cleanliness are also paramount. Professional guidance recommends using dust collection with HEPA filtration as part of best-practice safety procedures (Ceramic Tile Education Foundation, 2024)[1]. Connecting a dust containment device to a vacuum greatly reduces airborne silica particles. For those exploring advanced machinery, reviewing various colloidal mixer equipment categories can help identify tools that automate these precise speed and dust-control requirements. To ensure all dry powder is incorporated from the bottom and sides of the container, installers should employ a proper bucket tilt. Tilting the container to about a 45-degree angle during the process allows the paddle to reach the corners, preventing unmixed clumps from hiding at the base.
Managing Ratios and Partial Batches
Maintaining the exact manufacturer-specified water-to-powder ratio is non-negotiable for achieving a consistent cure and preventing joint discoloration. When a project requires less than a full bag, installers must weigh components to maintain the precise proportions rather than estimating by volume. Technical instructions specify that 100 percent of components should be proportioned by weight for partial mixes to ensure accuracy (Mapei Corporation, 2023)[3].
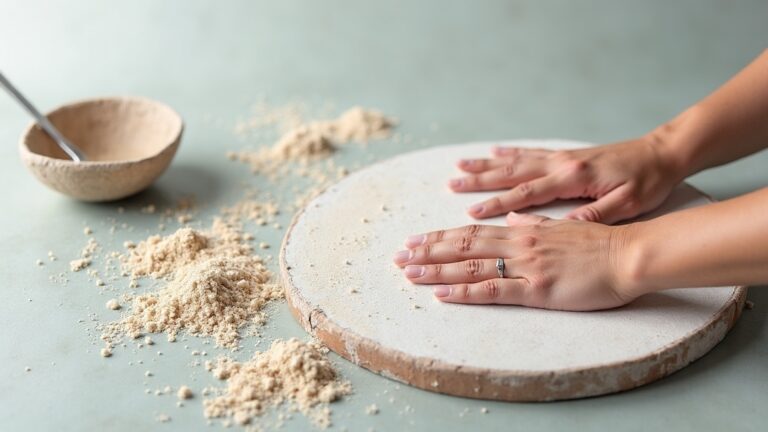
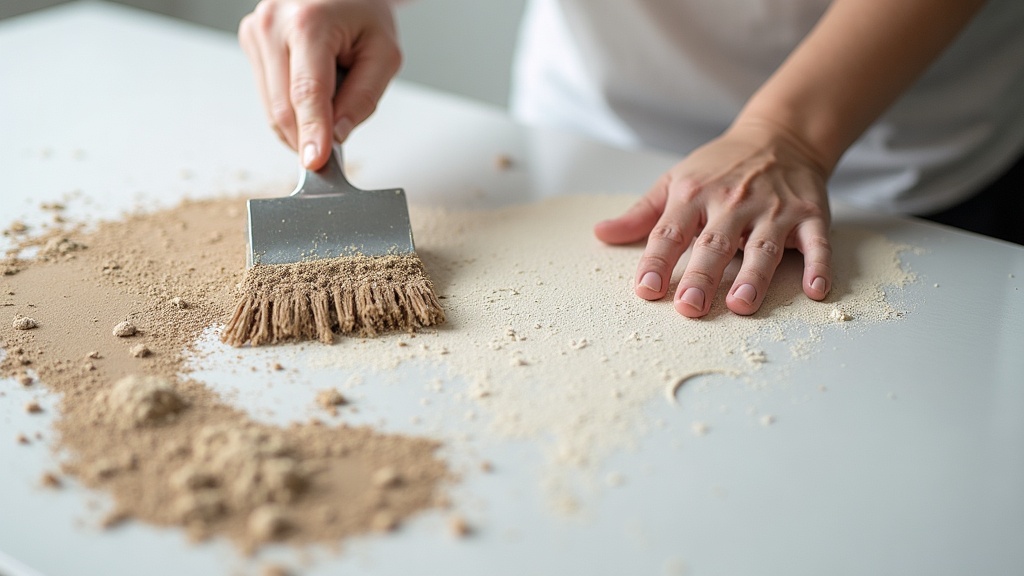
Before measuring out a smaller batch, it is vital to prepare the dry material correctly. Mapei Technical Services advises that “before mixing, always dry-blend the powder in a separate bucket to redistribute raw materials that may have settled and ensure a more consistent grout mix” (Mapei Corporation, 2023)[3]. This dry-blend step guarantees that the pigments and polymers are evenly distributed throughout the entire bag before any portion is removed.
Once mixed, installers must be mindful of the material’s pot life. Professional guidance commonly recommends mixing only as much as can be placed within about 30 minutes to avoid material setting in the bucket (The Created Home, 2024)[4]. Furthermore, the mixture will typically begin to stiffen in about 15 minutes after preparation (Bunnings, 2024)[5]. Adhering to these strict groutmixing guide instructions prevents waste and ensures the material remains workable during application. For comprehensive industry standards, consult the Tile Council of North America guidelines to verify specific ratio requirements for your chosen product.
Troubleshooting Consistency and Application
Evaluating the physical texture of the mixture before application prevents costly rework and ensures uniform joint widths. The ultimate goal is a smooth, lump-free paste that holds its shape when scooped with a trowel. Professional how-to guidance consistently advises continuing to mix until there are zero visible lumps in the mixture before slaking and application (Rubi Tools USA, 2024)[2].
If the texture appears too dry or crumbly, the issue usually stems from inaccurate measuring or inadequate mixing time, rather than a lack of water. Adding liquid after the initial slaking phase will break down the polymer chains, leading to a weak surface that is prone to efflorescence and cracking. Instead, rely on a thorough groutmixing guide to master the visual cues of perfect consistency, which should resemble thick peanut butter.
Different materials also demand specific handling techniques. While standard cementitious products are forgiving, polymer-modified and epoxy variants require stricter adherence to environmental conditions and mixing times. For specialized commercial applications, reviewing detailed equipment demonstration samples can help contractors select the right automated tools for high-volume jobs. Additionally, professionals frequently reference a dedicated groutmixing guide on colloidalgroutmixer.com to troubleshoot complex issues related to large-format tiles and extreme temperature environments. When applying the material, use a rubber float to press it deeply into the joints, working at a diagonal angle to the tile lines. This technique forces the mixture to the bottom of the joint, eliminating air pockets that could later cause voids or depressions.
Your Most Common Questions
Why is the slaking period mandatory?
The slaking period is a mandatory rest phase that allows the dry ingredients to fully absorb the liquid, activating the chemical binders and polymers. If you skip this 10-minute rest, dry pockets will remain hidden in the mixture, leading to weak joints, color inconsistency, and premature cracking. Once the time has elapsed, a brief remixing phase restores the workable texture without needing additional water, ensuring a uniform application across the entire tiled surface.
Can I add more water if the mixture gets too thick?
No, you should never add water after the initial mixing and slaking phases have been completed. Adding extra liquid breaks down the polymer structure and alters the crucial powder ratio, which weakens the final cure and causes surface efflorescence. If the batch becomes too stiff to work with during installation, it has simply exceeded its usable pot life. The only correct course of action is to discard the stiffened material and prepare a fresh, properly proportioned batch.
How do I properly mix a partial bag of grout?
To mix a partial batch correctly, you must first dry-blend the entire unopened bag in a separate container to evenly distribute the settled pigments and polymers. After blending, weigh both the dry powder and the liquid using a digital scale to maintain the exact manufacturer-specified ratio by weight. Never estimate partial amounts by volume using cups or buckets, as this inevitably leads to inconsistent curing, color variations, and compromised structural integrity in the finished joints.
What causes grout to powder or crack after installation?
Powdering and cracking are typically caused by improper mixing speeds, skipping the slaking phase, or adding too much water during the process. High-speed mixing entrains excess air into the paste, creating microscopic voids, while excess water weakens the structural matrix as it evaporates. Following a precise groutmixing guide and maintaining a steady motor speed of 300 rpm will prevent these common failures, ensuring the joints remain dense, durable, and visually consistent over time.
Comparing Grout Types
Different tile installations require specific materials, and understanding the differences between them is a core component of any comprehensive groutmixing guide. The table below outlines the primary characteristics of the three most common options used in modern construction.
| Type | Best Use Case | Mixing Complexity |
|---|---|---|
| Cementitious | Standard residential floors and walls | Low (requires slaking) |
| Polymer-Modified | High-traffic areas and outdoor patios | Medium (strict water ratios) |
| Epoxy | Commercial kitchens and wet rooms | High (multi-part chemical mix) |
While cementitious options are the most forgiving for beginners, polymer-modified variants offer superior flexibility and stain resistance. Epoxy systems, though highly durable, require rapid application and precise chemical proportioning, making them best suited for experienced professionals.
Practical Tips for Installers
Achieving a flawless finish requires more than just following a detailed groutmixing guide; it demands attention to environmental factors and job-site cleanliness. Here are several actionable best practices to elevate your tile installation projects:
- Control the Climate: Maintain the room temperature between 65°F and 75°F. Extreme heat causes flash-setting, while cold environments drastically extend curing time.
- Clean Tools Immediately: Wash your mixing paddle, bucket, and trowel with water before the material hardens. Cured residue is incredibly difficult to remove and can contaminate future batches.
- Use Distilled Water: If your local tap water has high mineral content, switch to distilled water to prevent unexpected chemical reactions and discoloration.
- Protect the Surface: Cover the freshly applied joints with a breathable membrane to ensure a slow, even cure, which significantly increases the final compressive strength.
Implementing these strategies will minimize callbacks and ensure your hard work stands the test of time.
Final Thoughts on the Groutmixing Guide
Mastering the art of preparation is the foundation of every successful tiling project. By respecting the chemical processes, adhering to precise ratios, and utilizing the correct equipment, you can avoid the most common pitfalls associated with joint failure. Whether you are tackling a small bathroom renovation or a large commercial space, a reliable groutmixing guide ensures your results are both beautiful and structurally sound. For more in-depth tutorials and professional equipment reviews, continue exploring the extensive resources available on colloidalgroutmixer.com.
Sources & Citations
- Six Steps for Mixing Mortars and Grouts. Ceramic Tile Education Foundation.
https://www.ceramictilefoundation.org/blog/6-steps-mixing-mortars-grouts - How to Mix Grout. Rubi Tools USA.
https://www.rubi.com/us/blog/how-to-mix-grout/ - Mixing Partial Units of Grout. Mapei Corporation.
https://cdnmedia.mapei.com/docs/librariesprovider10/line-technical-documentation-documents/mixing-partial-units-of-grout.pdf - Grout Tile Beginners Guide. The Created Home.
https://thecreatedhome.com/grout-tile-beginners-guide/ - How to Mix Grout (DIY Training Video). Bunnings.
https://www.youtube.com/watch?v=ub5–rxLrtA
For more about Groutmixing guide, see Groutmixing Guide.