Comprehensive Concretegrout Guide for Baseplates
Discover our comprehensive concretegrout guide for preparing substrates, mixing cementitious materials, and ensuring strong structural support for baseplates.
Table of Contents
- Preparing the Substrate for Optimal Adhesion
- Mixing Procedures and Temperature Control
- Formwork Setup and Placement Techniques
- Troubleshooting Common Application Failures
- Your Most Common Questions
- Comparing Grout Placement Methods
- Practical Tips for Success
- The Bottom Line
Quick Summary
A concretegrout guide is a comprehensive instructional framework detailing the preparation, mixing, and placement of cementitious materials for structural baseplates. It covers substrate saturation, temperature control, and formwork setup to ensure optimal compressive strength and prevent common application failures.
The Concretegrout Guide in Context
- Recommended presoak duration before placing grout on concrete substrate: 18-24 hours (Specchem, 2024)[1].
- Typical clearance recommended for forms around a baseplate: 25 mm (Big League Construction Services, 2024)[3].
- Head box or flow box elevation recommended for placing grout under a baseplate: 150-200 mm (Specchem, 2024)[1].
- Recommended mixing time for uniform, lump-free grout consistency: 5 minutes (Specchem, 2024)[1].
Introduction
When executing heavy structural installations, following a reliable concretegrout guide is essential for long-term stability. The process of securing machinery and structural columns requires precise material handling and strict adherence to engineering specifications. A well-executed guide to concrete grout ensures that loads are evenly transferred from the steel baseplate to the concrete foundation. This article explores the critical phases of the application process, from initial surface preparation to final curing. By understanding the nuances of cementitious grout behavior, contractors can avoid costly rework and achieve the required compressive strength. Whether you are reviewing a concrete grout manual for the first time or refining your existing protocols, these insights will help you achieve superior results on your next project.
Preparing the Substrate for Optimal Adhesion
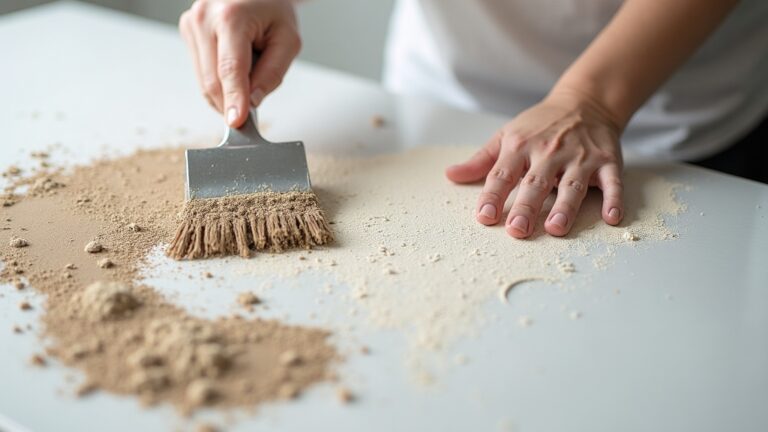
Proper surface preparation is the foundational step in any successful concrete grouting project. The bond between the cementitious grout and the existing concrete foundation relies entirely on the condition of the underlying substrate. Before any material is mixed, the surface must be thoroughly cleaned of oil, grease, dust, and loose debris. Mechanical roughening is often required to expose the aggregate and create a profile that promotes mechanical interlock.
According to industry experts, “Cleaning, roughening, and presoaking the concrete substrate with water for 18-24 hours are essential steps to be taken before placing grout” (Specchem, 2024)[1]. This saturation process is critical because dry concrete will rapidly absorb the moisture from the wet grout, leading to premature drying and reduced strength.
Achieving the right level of saturation requires careful planning. “Concrete surfaces should be rough and saturated (ponded) with clean water for 24 hours just prior to grouting” (Sika USA, 2024)[2]. However, while the substrate must be fully saturated, it is equally important to remove all free-standing water immediately before placement. A damp, saturated surface with no visible puddles provides the ideal environment for the grout to hydrate properly and bond securely to the foundation. This meticulous approach to substrate preparation prevents delamination and ensures the structural support system performs as designed.
Mixing Procedures and Temperature Control
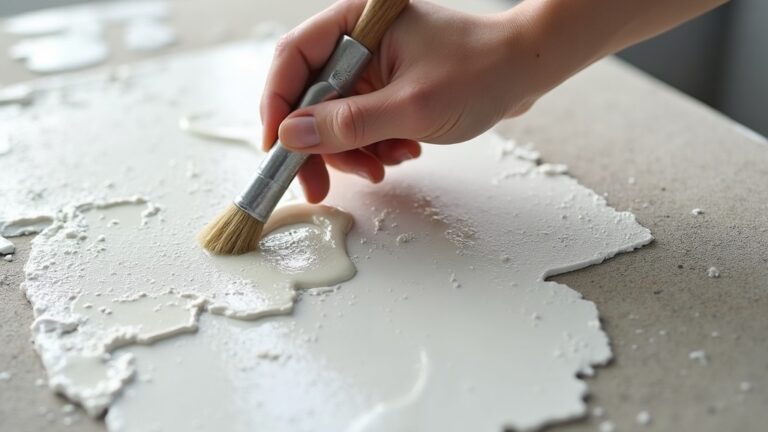
The mixing phase dictates the final physical properties of the installed material, making it a central focus of any concrete grout manual. Achieving a uniform, lump-free consistency requires the correct ratio of mixing water to dry powder and adequate mechanical agitation. High-shear mixers are typically employed to break up agglomerations and ensure complete hydration of the cement particles.
For optimal results, the recommended mixing time for a uniform, lump-free grout consistency is 5 minutes (Specchem, 2024)[1]. Under-mixing can leave dry pockets that weaken the final matrix, while over-mixing might introduce excess air or alter the rheology. Contractors seeking advanced techniques for high-shear applications can explore our detailed colloidal grout mixing category for specialized equipment insights.
Temperature control is another vital parameter, especially during cold-weather grouting. The substrate and the mixed material must be kept warm to ensure proper curing. The minimum temperature to keep the substrate and grout warm during cold-weather grouting is 4 °C (Specchem, 2024)[1]. To achieve this in freezing conditions, contractors often use warm mixing water, though the upper temperature for using warm mixing water during cold-weather grouting should not exceed 32 °C (Specchem, 2024)[1]. Maintaining these thermal boundaries prevents flash setting and ensures the material reaches its target design strength without thermal shock.
Formwork Setup and Placement Techniques
Constructing robust formwork is essential to contain the fluid material and direct it precisely beneath the baseplate. The forms must be watertight to prevent the loss of cement paste, which could lead to voids and compromised structural support. When building the forms, the typical clearance recommended for forms around a baseplate is 25 mm (Big League Construction Services, 2024)[3]. This gap allows for adequate flow and ensures the material can fully encapsulate the anchor bolts and plate edges.
To facilitate continuous flow and prevent air entrapment, a head box or flow box is constructed on the feed side. The head box or flow box elevation recommended for placing grout under a baseplate is 150-200 mm (Specchem, 2024)[1]. This hydrostatic head pressure forces the material across the entire bearing area, pushing air ahead of the flow front. For comprehensive industry benchmarks, professionals often consult the American Concrete Institute grouting standards to verify their formwork designs.
In areas where fluid placement is not feasible, alternative methods are required. “Place cement-based grout in small volumes by mixing the product to a trowelable consistency, push the product into place under the baseplate and finish the edges generally at a 45-degree slope from the bottom of the baseplates out onto the foundation” (Fosroc, 2024)[4]. This dry-pack technique is highly effective for edge finishing and small repair zones where traditional flowable placement cannot be utilized.
Troubleshooting Common Application Failures
Even with meticulous planning, environmental factors and material inconsistencies can lead to defects. A thorough guide for concrete grouting must address these potential failures to help contractors identify and mitigate risks early in the process. Visual inspections during and after placement are crucial for catching issues before the material fully cures.
According to material specialists, “The most common cement grout problems are shade variation, blotching, cracking, powdering, and efflorescence” (LATICRETE, 2024)[5]. Shade variation and blotching are primarily aesthetic concerns but can indicate inconsistent water ratios or uneven curing conditions. Cracking, on the other hand, is a structural threat often caused by rapid moisture loss, thermal shrinkage, or excessive water in the mix design.
Powdering occurs when the surface fails to cure properly, usually due to freezing temperatures or inadequate protection from wind and sun. Efflorescence manifests as a white, powdery deposit on the surface, resulting from water-soluble salts migrating to the surface as moisture evaporates. To prevent these issues, the grout should be maintained above 4 °C until it reaches a compressive strength of 3000 psi in cold conditions (Specchem, 2024)[1]. For beginners looking to practice proper curing and troubleshooting techniques, reviewing introductory hello world projects can provide valuable hands-on experience before tackling major structural installations.
Your Most Common Questions
How long should I presoak the concrete before grouting?
Industry standards dictate that the concrete substrate must be thoroughly saturated before any material is placed. The recommended presoak duration is between 18 and 24 hours. This extended saturation period ensures that the dry concrete does not absorb the mixing water from the cementitious grout, which would otherwise lead to premature drying, reduced compressive strength, and potential bond failure. Always remove standing water just before placement.
What is the ideal temperature for cold-weather grouting?
During cold-weather grouting, it is critical to maintain the substrate and the mixed material above 4 °C. If the ambient temperature drops below this threshold, the hydration process slows down significantly, and freezing can destroy the matrix. Contractors should use warm mixing water, ensuring the water temperature does not exceed 32 °C, and maintain the installed material above 4 °C until it achieves a minimum compressive strength of 3000 psi.
How do I prevent efflorescence and cracking in cement grout?
Preventing efflorescence and cracking requires strict control over the water-to-cement ratio and proper curing conditions. Avoid adding excess mixing water, as this increases shrinkage and promotes the migration of water-soluble salts to the surface. Protect the fresh material from rapid moisture loss caused by wind, direct sunlight, or freezing temperatures. Utilizing proper formwork and maintaining thermal boundaries during the initial curing phase will significantly reduce the risk of these common defects.
What clearance is needed for formwork around a baseplate?
When constructing formwork to contain flowable material, the typical clearance recommended around the perimeter of a baseplate is 25 mm. This specific gap provides enough space for the grout to flow freely and encapsulate the edges of the steel plate and anchor bolts without creating air pockets. Additionally, building a head box with an elevation of 150 to 200 mm on the feed side ensures adequate hydrostatic pressure for complete bearing area coverage.
Comparing Grout Placement Methods
Selecting the right placement technique is a critical decision outlined in every concretegrout guide. The chosen method depends on the volume required, the accessibility of the baseplate, and the specific rheology of the selected material. Below is a comparison of the primary placement approaches used in modern construction.
| Method | Best Application | Key Advantage |
|---|---|---|
| Gravity Flow | Large baseplates with open edges | Continuous, air-free filling via head pressure |
| Pumping | High-volume, deep foundation voids | Rapid placement over long distances |
| Dry Pack / Trowelable | Small gaps, edge finishing, repairs | Precise control in confined or shallow spaces |
Practical Tips for Success
Achieving a flawless installation requires attention to detail beyond the basic instructions found in a standard concrete grout guide. Environmental conditions, equipment maintenance, and site logistics all play a role in the final outcome. Implementing the following best practices will help you avoid common pitfalls and ensure a durable structural connection.
- Test the flowability: Always perform a slump or flow cone test before full-scale placement to verify the water-to-powder ratio yields the correct rheology.
- Seal formwork thoroughly: Use a high-quality sealant or caulking on all form joints to prevent the loss of cement paste, which can cause honeycombing and voids under the baseplate.
- Monitor ambient conditions: Track both air and substrate temperatures continuously. If conditions change rapidly, adjust your mixing water temperature or deploy insulating blankets immediately.
- Clean equipment promptly: Cementitious materials set quickly. Flush mixers, pumps, and hoses with clean water immediately after use to prevent hardened buildup that can damage equipment.
The Bottom Line
Mastering the application of cementitious materials requires strict adherence to proven engineering principles. By following a comprehensive concretegrout guide, contractors can ensure proper substrate preparation, precise mixing, and flawless placement beneath structural baseplates. Controlling temperature, managing formwork clearances, and troubleshooting potential defects are all vital components of a successful installation. For more insights on heavy-duty mixing equipment and advanced application techniques, explore the extensive resources available on colloidalgroutmixer.com.
Learn More
- How to Grout: Essential Procedures for Effective Concrete Grouting. Specchem.
https://specchem.com/resources/how-to-grout/ - Guide to Cementitious Grouting. Sika USA.
https://usa.sika.com/dam/dms/us01/v/guide-to-cementitious-grouting-tech-bulletin.pdf - Best Practices for Cementitious Grout Preparation and Placement. Big League Construction Services.
https://bigleaguecs.com/best-practices-for-cementitious-grout-preparation-and-placement/ - Fosroc Conbextra Cementitious Grouts Application Guide. Fosroc.
https://www.fosroc.com.au/sites/default/files/resources_file_storage/Fosroc_Conbextra_Cementitious_Grouts_Application_Guide.pdf - Cement Grouts. LATICRETE.
https://www.laticrete.com/support-and-training/downloads-and-faq/faqs/planning-a-job/cement-grouts
For more about Concretegrout guide, see Concretegrout Guide.