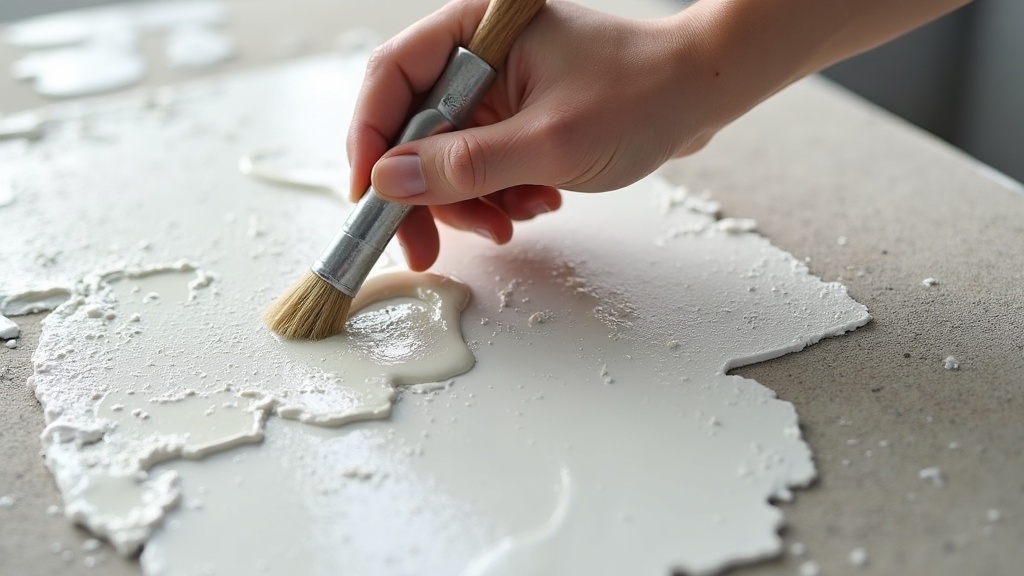
Grout Mixing Guide for Perfect Tile Installation
Read our detailed groutmixing guide for perfect tile installations. Learn exact water ratios, slake times, and expert tips for flawless results today.
Table of Contents
- Equipment and Material Preparation
- Executing the Perfect Blend
- Mastering Slake Time and Consistency
- Managing Batch Sizes and Environment
- Questions from Our Readers
- Comparing Preparation Methods
- Practical Tips for Success
- Key Takeaways
Article Snapshot
This grout mixing guide is a comprehensive instructional resource detailing the precise methods for combining cementitious powders and liquids. Proper preparation ensures structural integrity, prevents premature hardening, and guarantees a uniform consistency for professional tile and masonry applications.
Market Snapshot
- Cementitious mixtures require 3-4 minutes of minimum mixing time to reach uniform consistency (SpecChem LLC, 2025)[1].
- Proper chemical bonding demands 10 minutes of slake time before final remixing (RUBI Tools USA, 2024)[2].
- Substrate and material temperatures must remain at or above 4 degrees Celsius during placement (Big League Construction Services, 2025)[3].
Achieving a flawless tile finish begins long before the trowel touches the substrate. This grout mixing guide provides the foundational knowledge required to transform dry cementitious powders into a workable, durable compound. Many DIY renovation enthusiasts and novice contractors underestimate the chemical reactions that occur during preparation, leading to cracked joints or uneven curing. By following precise measurements and respecting critical resting periods, you can avoid these common pitfalls. The following sections break down the essential phases of preparation, from measuring ingredients to understanding the working window. Whether you are tackling a small bathroom backsplash or a large structural grouting project, mastering these techniques will elevate the quality of your tile installation. We will explore the necessary equipment, detail the step-by-step blending process, and highlight the environmental conditions that dictate success.
Equipment and Material Preparation for Grout
Selecting the right tools and preparing your materials are the critical first steps in any successful installation. A proper grout preparation guide always emphasizes the importance of using clean, potable water to prevent chemical interference. Impurities in the liquid can weaken the final bond and alter the curing process. When dealing with small quantities, a standard drill with a jiffy mixer provides adequate agitation. However, for larger volumes, professionals rely on a paddle-blade mortar mixer to ensure complete integration of the dry and wet components.
Temperature control is another vital factor often overlooked in basic mixing grout instructions. The substrate temperature and the ambient climate directly influence how quickly the compound sets. Experts advise maintaining grout and substrate temperatures at or above 4 degrees Celsius to ensure proper performance during placement and curing (Big League Construction Services, 2025)[3]. If the environment is too cold, the chemical hydration slows down drastically, compromising structural integrity.
To achieve the best results, use clean, potable water in the correct ratio and mix cementitious grout for at least three to four minutes, using appropriate mixing equipment for the batch size (SpecChem Technical Services, 2025)[1]. Investing in high-quality tools makes a noticeable difference. For specialized industrial applications, exploring advanced colloidal mixing technology can significantly reduce prep time while improving shear strength. Proper equipment selection ensures that every particle is fully encapsulated, eliminating dry pockets that could later cause structural failures.
Executing the Perfect Blend
The physical act of combining water and powder requires strict adherence to specific ratios and timing to activate the binding agents. A reliable grout blending manual dictates that you should never dump all the ingredients into a bucket simultaneously. Instead, start by adding a portion of the liquid to the mixing vessel before introducing the dry cementitious grout. This prevents the powder from clumping at the bottom and sticking to the sides of the container.
For standard DIY projects, Home Depot instructs users to initially add about 75 percent of the total mix water to the powder and adjust as needed to reach proper consistency (The Home Depot, 2024)[4]. Conversely, for large batches of precision non-shrink grout, contractors are advised to begin with about 66 percent of the total mix water before adding the powder and mixing for five minutes (Big League Construction Services, 2025)[3]. This staged approach allows the operator to gauge the viscosity and make minor adjustments without over-hydrating the mixture.
Once the initial combination is complete, continuous agitation is mandatory. Cementitious grout should typically be mixed for at least 3 to 4 minutes to properly combine materials and reach a uniform consistency (SpecChem LLC, 2025)[1]. Stopping too early leaves unmixed lumps that will create weak points in the tile joints. You should keep mixing grout until there are no lumps, then let the grout mixture sit, or ‘slake,’ for about 10 minutes so the chemicals can bond and strengthen (RUBI Tools Technical Team, 2024)[2]. This initial blending phase sets the stage for the crucial chemical resting period that follows.
Mastering Slake Time in This Grout Mixing Guide
Allowing the mixture to rest is a non-negotiable chemical phase that directly impacts the final strength and workability of the compound. This resting period, known as slake time, gives the polymers and cementitious particles time to fully absorb the liquid. Both RUBI Tools and Home Depot recommend allowing mixed grout to sit undisturbed for about 10 minutes to slake before remixing and using (RUBI Tools USA, 2024)[2]. Skipping this step results in a stiff mixture that is difficult to spread and prone to shrinking as it cures.
After the 10-minute rest, the compound must be remixed briefly to restore its plasticity. It is crucial to remember that no additional liquid should be introduced during this second agitation. RUBI Tools explicitly advises against adding extra water after slaking, instead simply remixing before application (RUBI Tools USA, 2024)[2]. Adding water at this stage breaks the chemical bonds that formed during the rest period, severely weakening the final installation.
Evaluating the final texture is the last step before application. The consistency of grout should resemble smooth peanut butter – it needs to be malleable but not dripping from the trowel when lifted (Home Depot Pro Staff, 2024)[4]. If the peanut butter consistency is achieved, the compound is ready to be forced into the tile joints. For further technical specifications on material tolerances, reviewing ceramic tile installation standards provides excellent baseline metrics for professional contractors.
Managing Batch Sizes and Environmental Factors
Controlling the volume of your mixture and monitoring the surrounding climate prevents premature hardening and structural failures. One of the most common mistakes highlighted in any grout mixing guide is preparing more material than can be applied before it begins to set. Only mix as much grout as you will be able to use in about thirty minutes, and start with a small first batch so you can dial in your process and water ratio before committing to larger mixes (The Created Home Editorial Team, 2024)[5].
Home Depot notes that the typical working time for grout after mixing is around 30 to 60 minutes before it fully hardens (The Home Depot, 2024)[4]. To manage this window effectively, Home Depot recommends starting with just a fraction of the total grout and mixing in small batches, specifically targeting 25-50 percent of the total grout per batch so it does not dry out too quickly (The Home Depot, 2024)[4]. This strategy ensures that every scoop applied to the substrate is fresh and highly workable.
Environmental conditions and structural depth also dictate batch modifications. For deep placements over 100 mm, Big League Construction Services recommends adding up to 50 percent pea gravel by volume for deep grout pours to control shrinkage and heat build-up (Big League Construction Services, 2025)[3]. The aggregate acts as a thermal sink and reduces the overall volume of cement, mitigating the risk of thermal cracking in thick structural grouting applications. Understanding these variables ensures long-lasting durability.
Questions from Our Readers
Why does my mixture dry out too quickly?
Premature drying usually occurs when the batch size exceeds your application speed or when ambient temperatures are too high. The typical working time is between 30 and 60 minutes. To prevent this, mix smaller batches that you can comfortably apply within half an hour and avoid working in direct sunlight or high heat.
Can I add more water if the compound gets too thick?
No, you should never add extra liquid after the initial slaking period. Adding water post-slake breaks the chemical bonds that formed during the resting phase, which severely compromises the structural integrity and adhesion of the final installation. If it becomes too stiff, discard it and mix a fresh batch.
What is the ideal texture for filling tile joints?
The ideal texture is often compared to smooth peanut butter. It should be highly malleable and easily spreadable, but it must hold its shape and not drip or sag when lifted on a trowel. This balance ensures it packs tightly into the joints without slumping.
How long should I agitate the powder and liquid?
You should agitate the materials for a minimum of three to four minutes. This duration ensures that all dry pockets are eliminated and the chemical activators are evenly distributed throughout the compound. For very large commercial batches, extending this to five minutes may be necessary.
Comparing Preparation Methods
Different project scales require distinct approaches to material preparation. Evaluating the differences between small-scale DIY methods and large-scale commercial techniques helps contractors choose the right workflow. This grout mixing guide outlines the primary distinctions in the table below.
| Feature | Small Batch (DIY) | Large Batch (Commercial) |
|---|---|---|
| Initial Water Addition | 75% of total liquid | 66% of total liquid |
| Mixing Equipment | Drill with jiffy mixer | Paddle-blade mortar mixer |
| Agitation Duration | 3 to 4 minutes | 5 minutes |
| Batch Volume Strategy | Mix 25-50% of total needed | Continuous full-batch mixing |
Practical Tips for Success
Mastering the preparation process requires attention to detail and consistent habits. Always measure your ingredients by weight or volume rather than guessing, as slight deviations in the water ratio can drastically alter the curing time. Before starting, ensure all your tools are completely clean; dried residue from previous projects can introduce contaminants that weaken the new bond. While a basic grout mixing tutorial might skip these details, professional results demand strict adherence to cleanliness.
When working on large floors, establish a systematic workflow. Mix your first small test batch to verify the consistency and adjust your technique before committing to the main installation. Utilizing high-efficiency mixing paddles designed specifically for viscous materials can significantly reduce physical strain and improve the uniformity of the blend.
Keep a damp sponge and clean water buckets nearby to wipe down your tools immediately after use. Cementitious compounds become incredibly difficult to remove once they fully harden. Finally, always check the manufacturer’s specific instructions on the bag, as proprietary polymer blends may require slight modifications to the standard resting periods or temperature thresholds. Following these practical steps ensures a professional, long-lasting finish every time.
For more about Groutmixing guide, see explore groutmixing guide in depth.
Key Takeaways
Proper preparation is the undisputed foundation of any successful tile or masonry project. By respecting precise liquid ratios, adhering to mandatory resting periods, and controlling your environment, you eliminate the most common causes of joint failure. This grout mixing guide has equipped you with the technical knowledge to approach your next installation with confidence. Remember that patience during the blending phase pays off with a durable, flawless finish. For more advanced techniques and equipment recommendations, explore our comprehensive industrial grout solutions to elevate your professional capabilities.
Useful Resources
- Mastering Cementitious Grout Applications: A Comprehensive Guide. SpecChem LLC.
https://specchem.com/resources/mastering-cementitious-grout-applications-a-comprehensive-guide/ - How to Mix Grout Perfectly Every Time. RUBI Tools USA.
https://www.rubi.com/us/blog/how-to-mix-grout/ - Best Practices for Cementitious Grout Preparation and Placement. Big League Construction Services.
https://bigleaguecs.com/best-practices-for-cementitious-grout-preparation-and-placement/ - How to Mix Grout. The Home Depot.
https://www.homedepot.com/c/ah/how-to-mix-grout/9ba683603be9fa5395fab9012db933cb - How to Grout Tile: A Beginner’s Guide. The Created Home.
https://thecreatedhome.com/grout-tile-beginners-guide/